Quick Bearer Token Generating
Introduction
This tutorial will present the fastest method to generate your bearer token. Not all LiveChat API methods can be authorised with PAT so sometimes for your test or development purposes the bearer token is required. Please note that bearer tokens have their expiration time and should be generated again or refreshed if needed.
Video
If you prefer the video tutorial, you could also watch it here:
Implict Grant
To generate our bearer token we will use the Implict Grant method authorising as an agent.
Steps
Create an app in your dev console
First, we need to create an app in the Developer Console. Log in there and choose to create a new app:

Name the app and proceed. For our test we used Bearer testing app.
Add and set the authorisation block
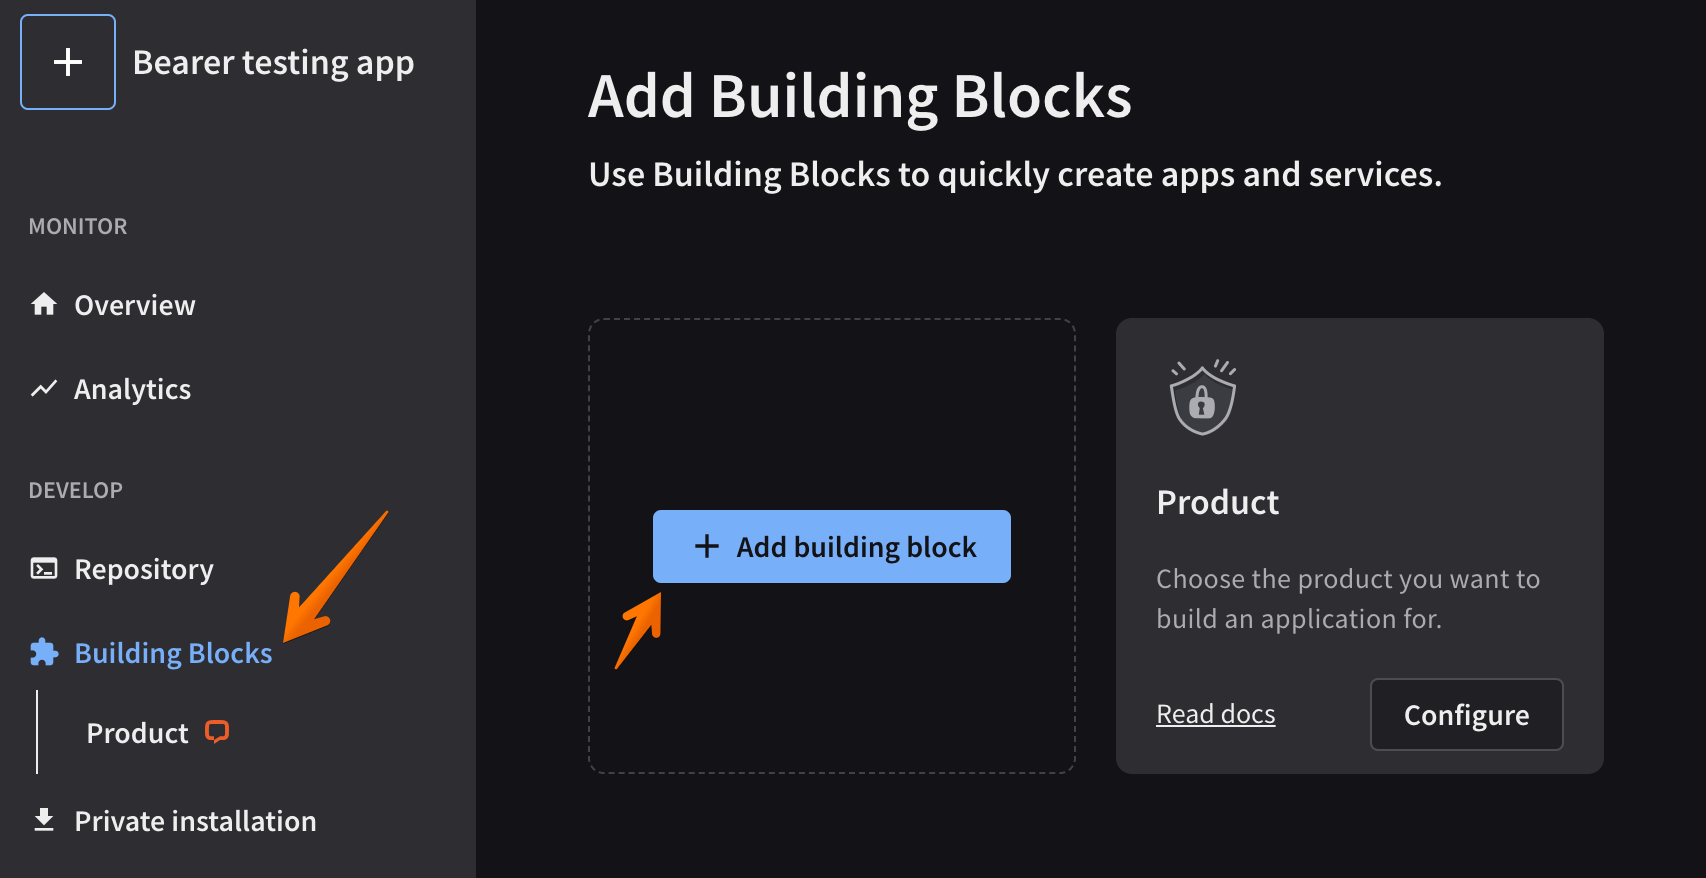
Go to the apps section and find your newly created app there. Click on it and add the App Authorization block:
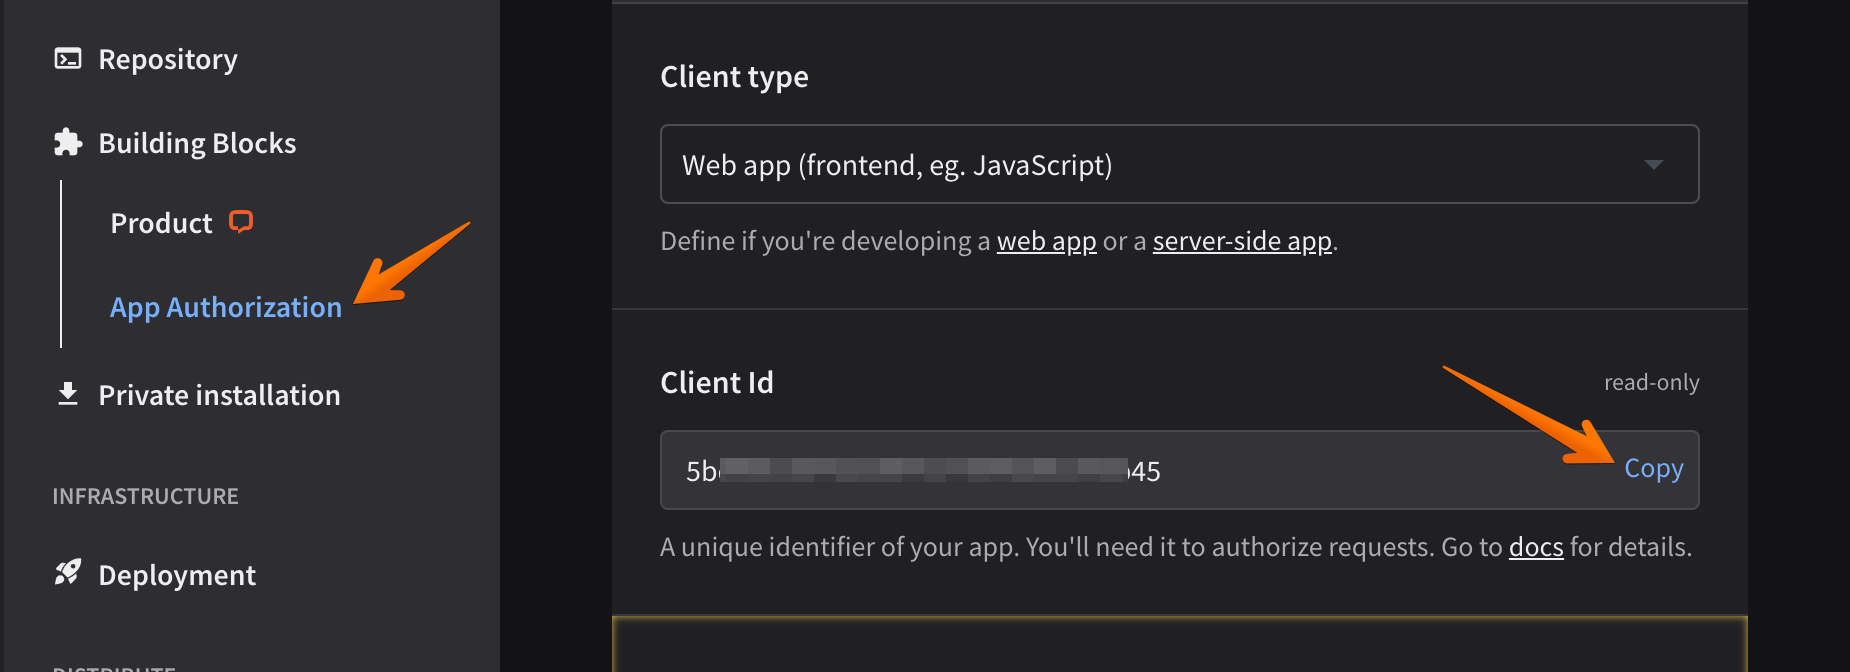
For our testing purposes we will choose the JavaScript app type. Open your App Authorization block and copy the Client Id - we will need it later.
Different API methods require different scopes to be authorized properly. For your tests you can choose Select all and click Save Changes:
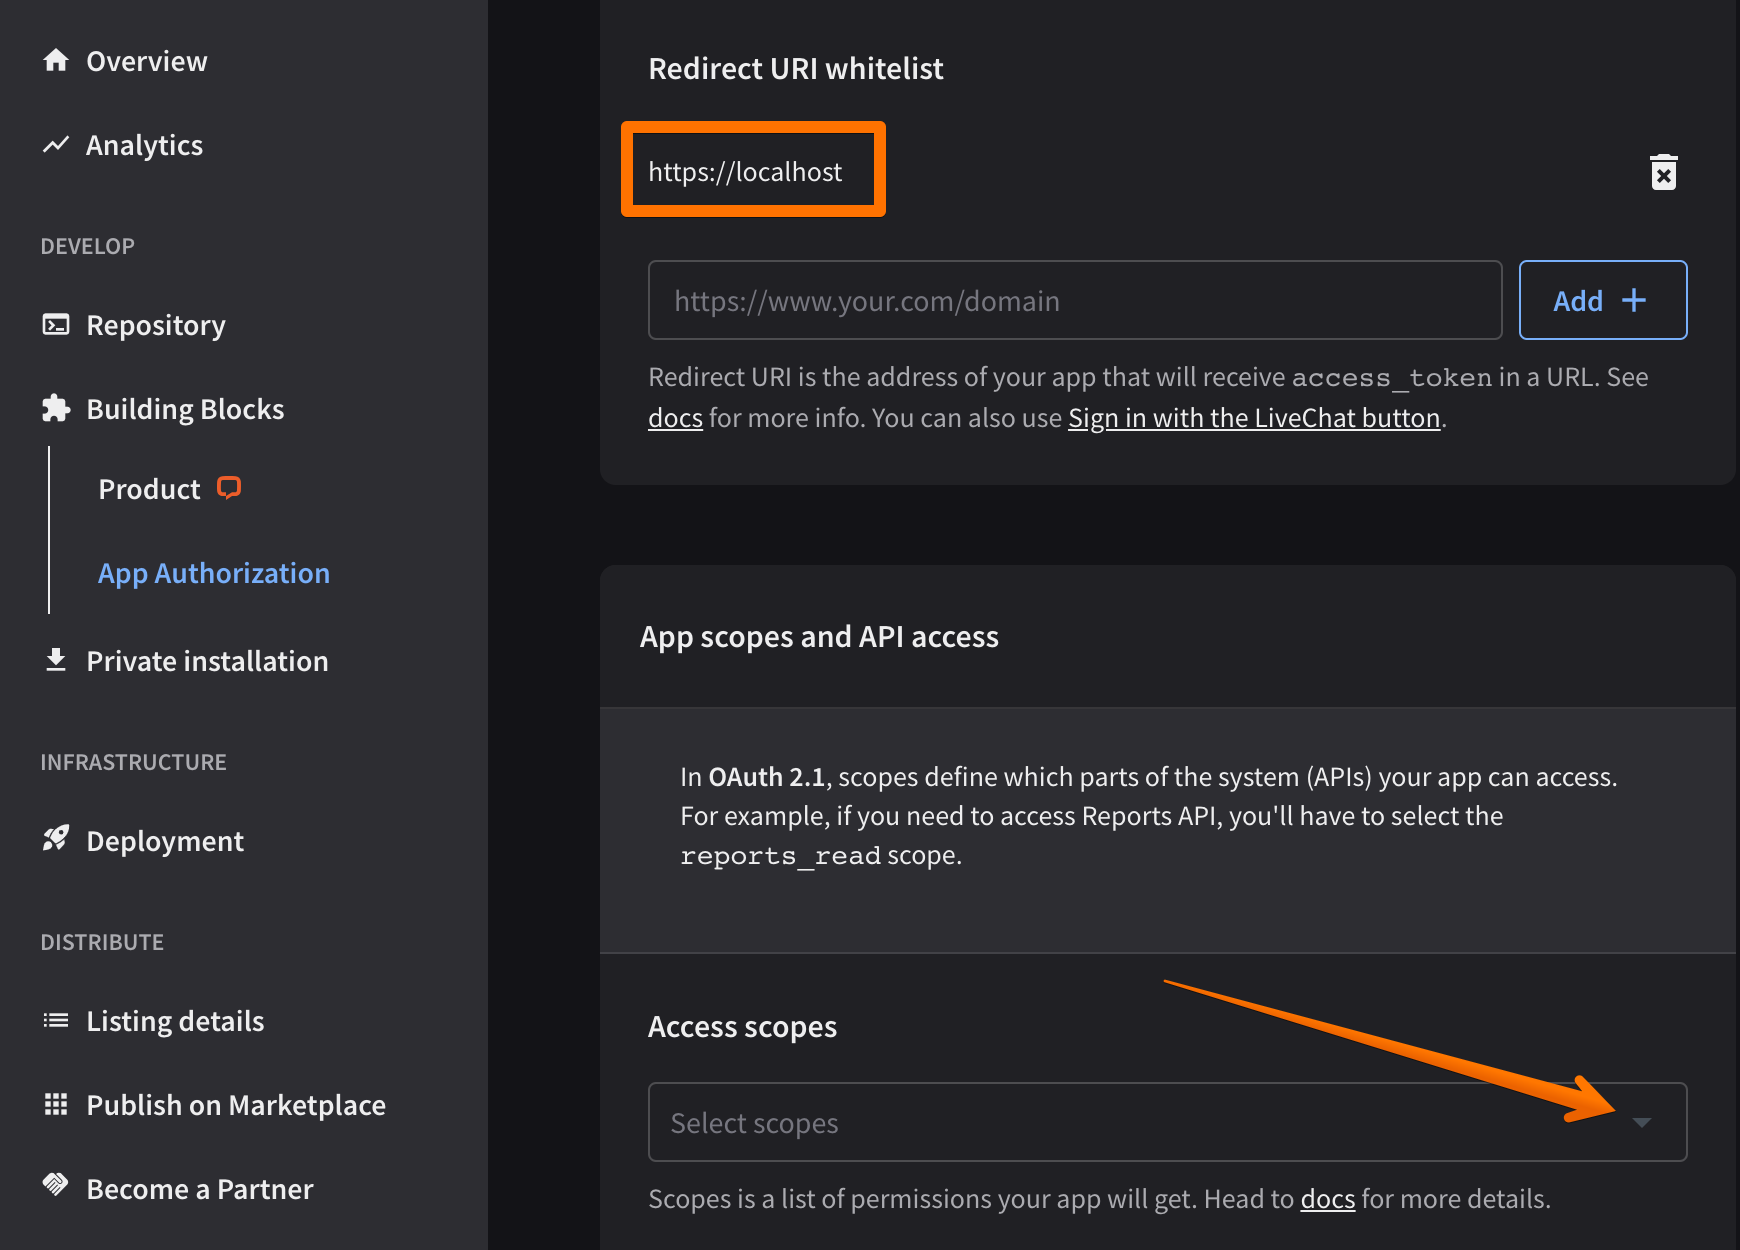
We will use the default set Redirect URI which is https://localhost.
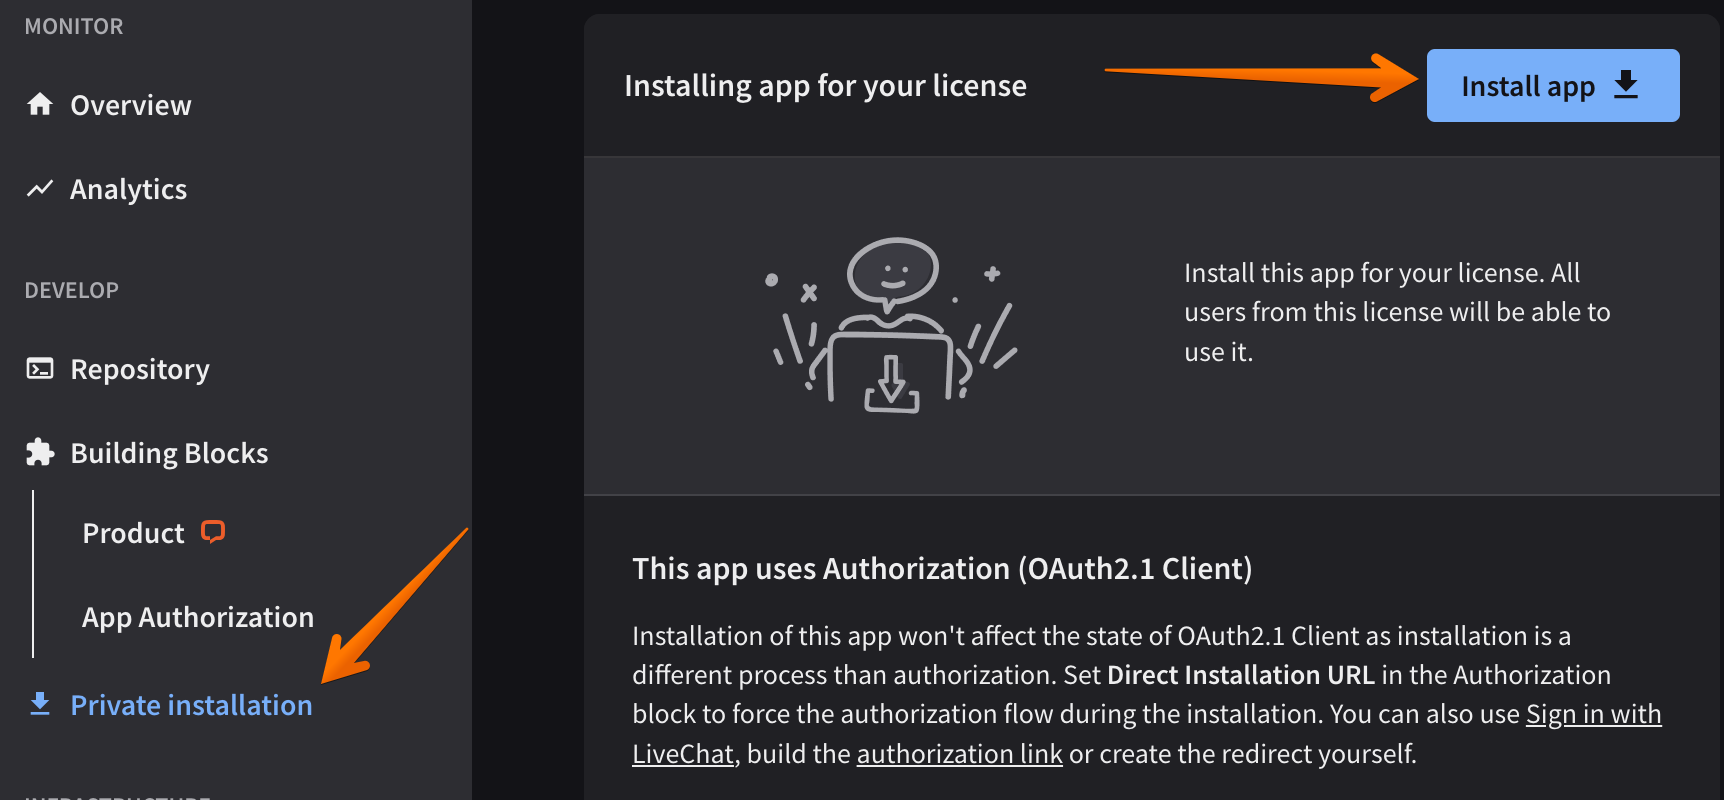
Once the scopes are saved, go to the Private Installation section and click Install App.
Preparing the URL�
Our app is intalled succesfully now so we can proceed with obtaining our bearer token.
https://accounts.livechat.com/
  ?response_type=token
  &client_id=9cbf3a968289727cb3cdfe83ab1d9836
  &redirect_uri=https%3A%2F%2Fmy-application.com
  &state=i8XNjC4b8KVok4uw5RftR38Wgp2BFwql
The documentation advises the above URL format to generate the bearer token. However, in our test the &state=i8XNjC4b8KVok4uw5RftR38Wgp2BFwql part is not necessary.
We will build our URL using the Client Id and https://localhost Redirect Uri. Note that the redirect_uri in the example is encoded https%3A%2F%2Fmy-application.com. The https:// was encoded into https%3A%2F%2F. We will need to do the same with our https://localhost and make it https%3A%2F%2Flocalhost.
Now we are ready to put our URL together:
https://accounts.livechat.com/?response_type=token&client_id=5bXXXXXb45&redirect_uri=https%3A%2F%2Flocalhost
Make sure to use your own client_id that you saved before.
Generating the token
Open a new tab of your browsing session, where you are logged in to the Developer Console. Paste the URL and push Enter.

Do not be discouraged because the site gives error! Your token is already generated!
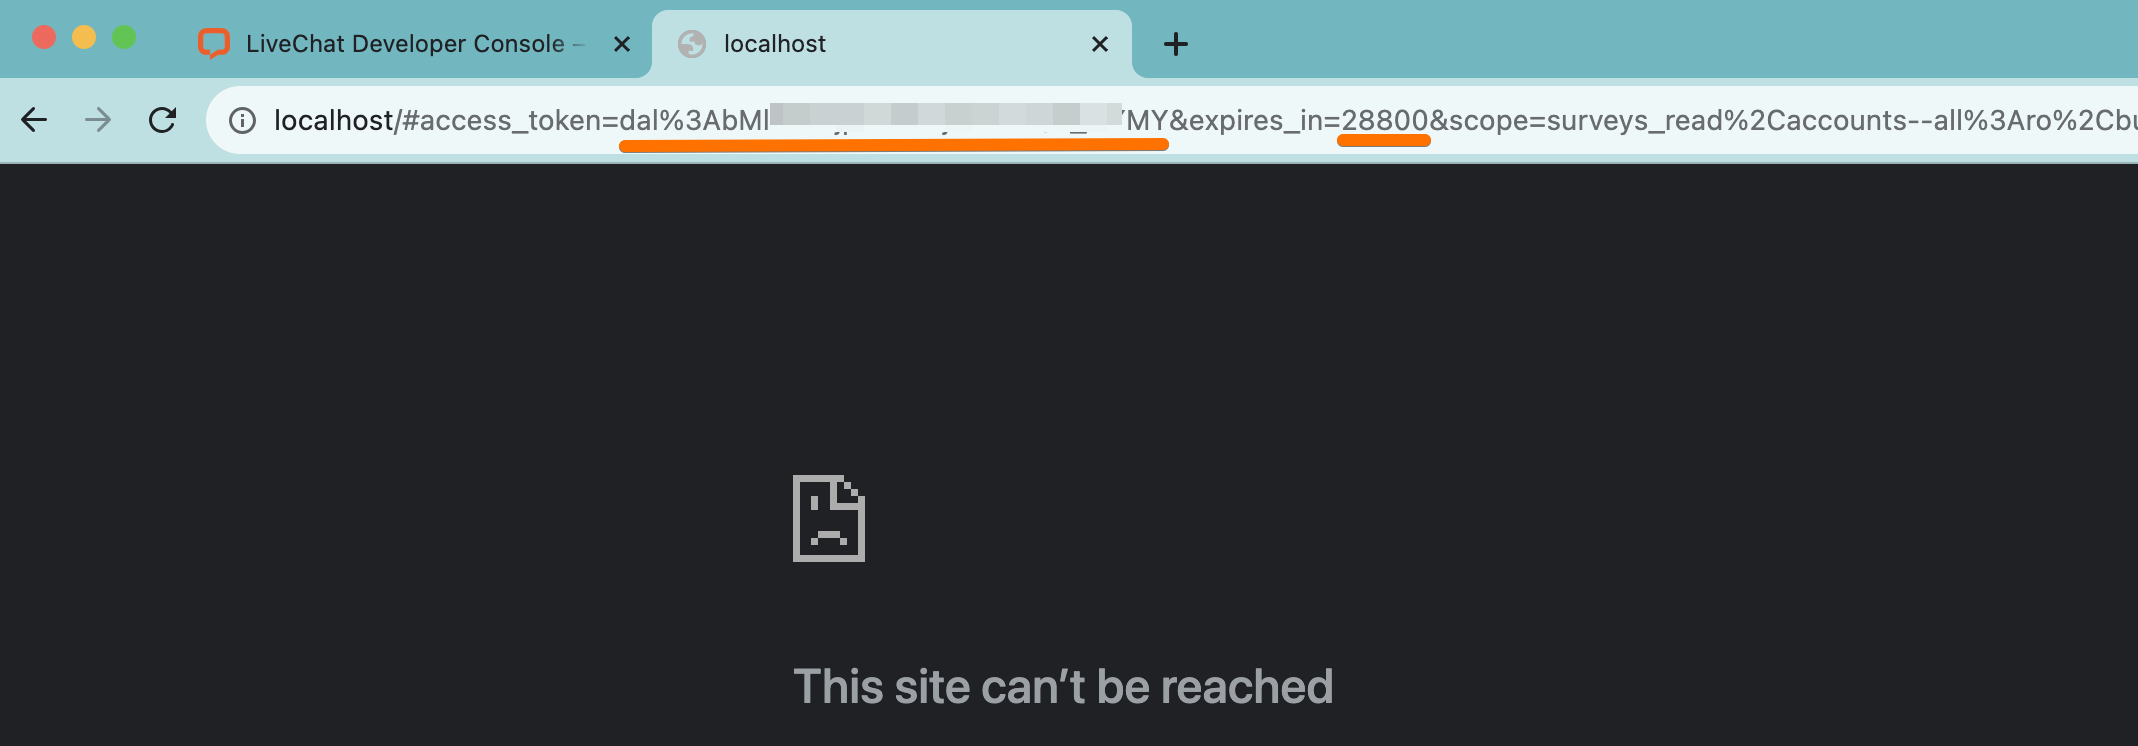
The token is still encoded dal%3AbXXXXXYMY. Before using it you need to exchange %3A with :. The example, ready to use token may look like this:
dal:AbMlE9GojpIYNSoj2oP2tQN_wYMY
The token will expire in 28800 seconds which means 8 hours. Now you can use it to test and authorise your API calls!
If you have any questions, let us know!
Yours, Text Team <3